
Did you know that Microsoft Excel allows you to define a specific name for any cell, something which can make locating and referencing that cell a lot easier?
For example, in a basic Excel formula, you may need to multiple the value in cell A1 (average monthly overhead) by the value in cell B1 (number of months) using the formula =sum(A1xB1). This would create the desired total in cell C1.
Now imagine you could name cell A1 “Overheads” and the cell B1 “Months”. The same formula above could now be expressed as =(OverheadsxMonths). So you can see how pinpointing the right figures needed to produce your quarterly or annual business projections could be made a little simpler.
How does it work?
To create a defined name for any cell right-click the cell and choose Define Name. Once clicked, a New Name window, like the one shown below should appear. Fill out the name you want to use and click Ok.
There are several types of names you can create and use:
Defined name – a name that stands for a cell, range of cells, formula, or constant value. You can define your own names or sometimes Microsoft Office Excel creates a defined name for you, such as when you set a print area.
Table name – this is a name for an Excel table, which is a collection of data referring to a specific subject, which is stored in rows and columns within your Excel worksheet. A default Excel table name of Table1, Table2 is created each time you insert a table, but you can change a table’s name to make it more meaningful.
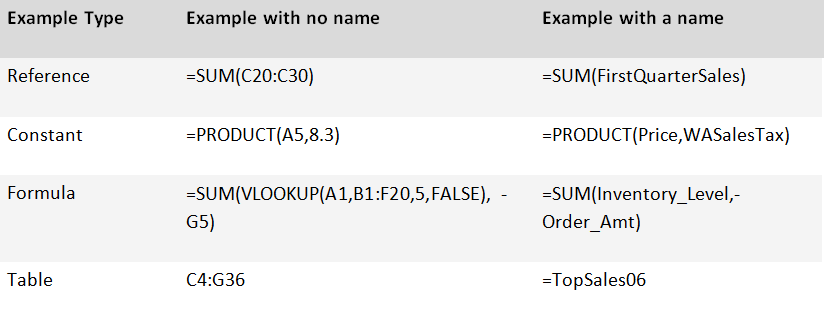
Examples of Excel names
The following table shows some common examples of names and how they can improve clarity and understanding within a complicated spreadsheet.
For more information, please consult Microsoft’s support article entitled: Define and use names in formulas