Those green and red squiggly lines proposed by Microsoft Word provide a useful way to keep an eye on your spelling and grammar. But what if you meant to type a word in a certain way? Then, this feature can be just plain annoying. So did you know you can adjust the auto-correction settings in Word to avoid this kind of frustration?
Use the steps below to ‘train’ Word’s auto-correction rules and create exceptions. You can also add words to Word’s custom dictionary to prevent these words being highlighted as misspellings.
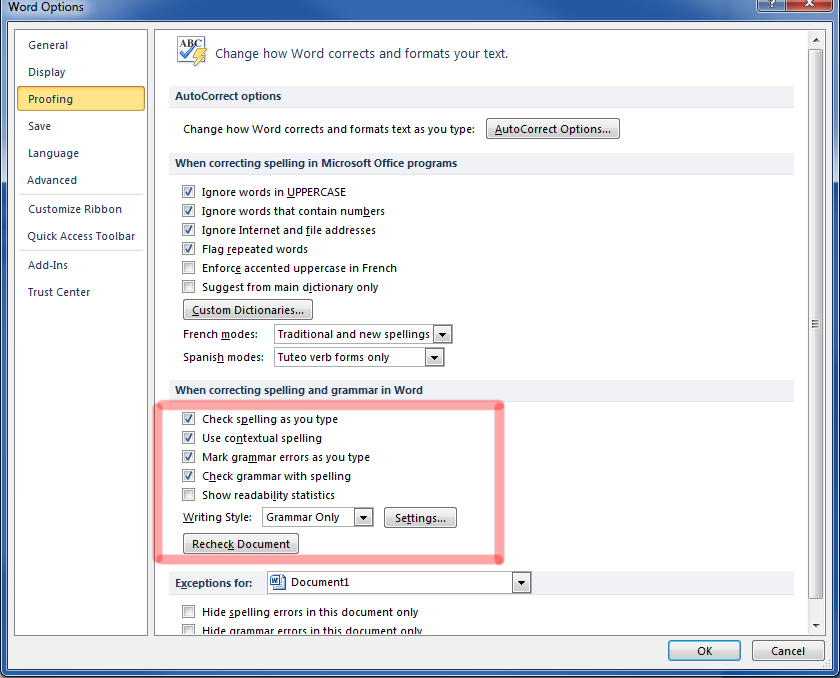
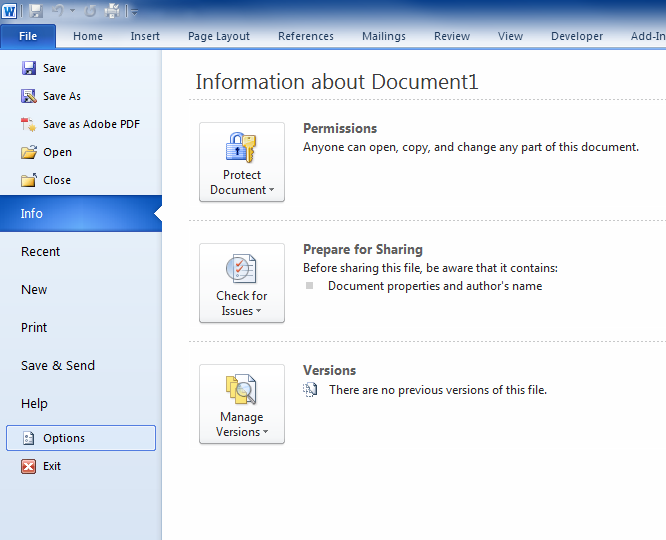
Click File then Options in the left menu.
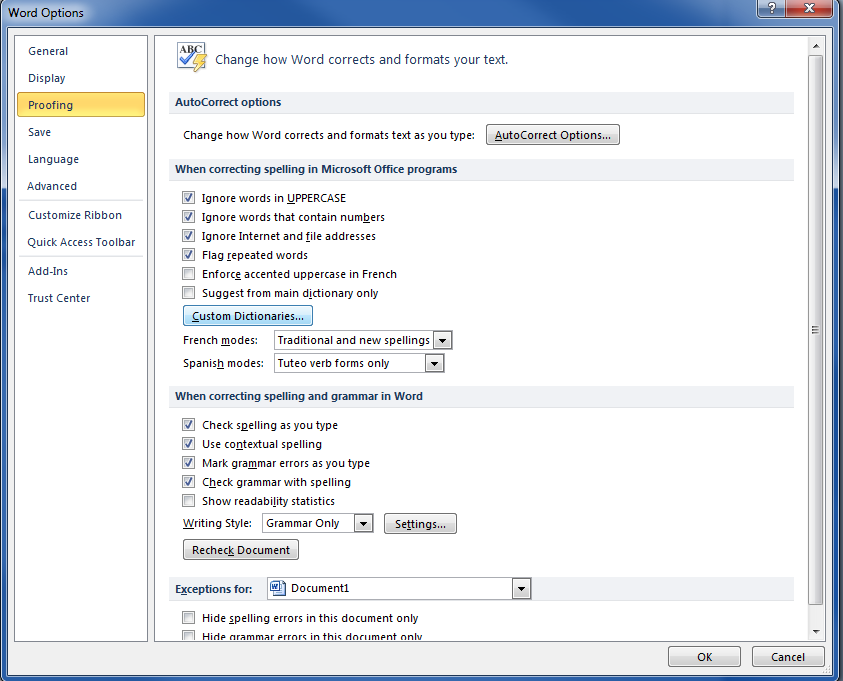
Click Proofing in the Word options window and then click the AutoCorrect Options button.
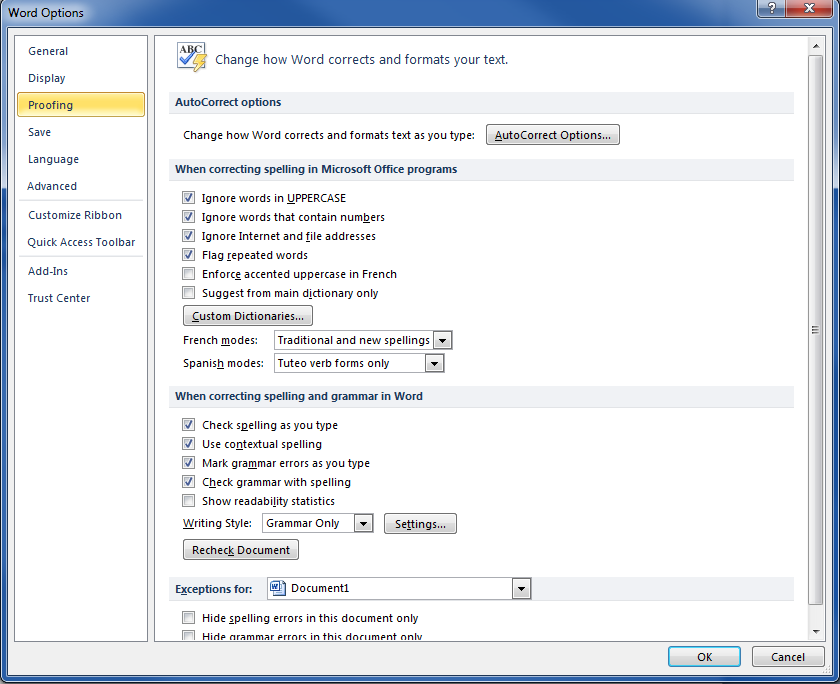
Click the Exceptions button. Review the list of auto-correction defaults and uncheck any that you do not wish to apply – for example, the rule that always capitalises the first letter of a word in a table cell.
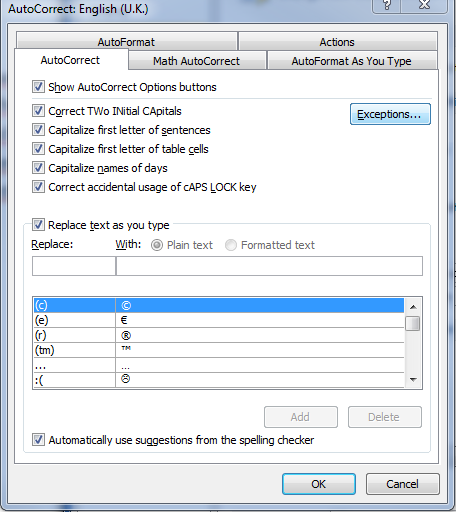
Click the tab of the type of auto-correction you wish to create an exception for. For example, does your organisation write its name in lowercase? Then select the First Letter checkbox to prevent Word from capitalising when you write the company name at the start of a sentence. What’s more, the Initial Caps tab can ensure Word does not correct that begin with two capital letters. Use the “Other Corrections” tab for all other words.
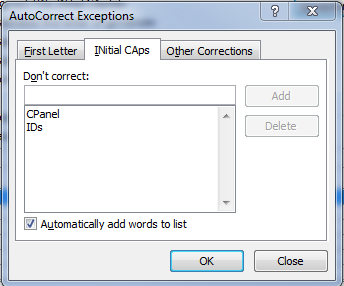
Add the word you don’t want corrected and click OK.
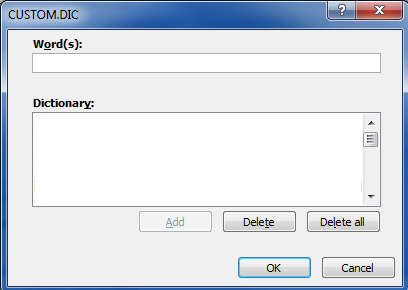
How to Add Words to the Custom Dictionary
Click on the Custom Dictionary button in the Word options window.
Select CUSTOM.DIC then click the Edit Word List button.
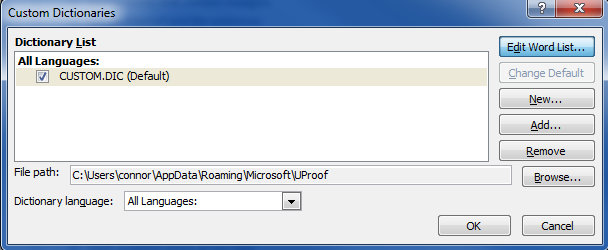
Add each word you don’t want marked as misspelled and click OK.
Click OK to close the Word options window.
You can also turn off spellcheck and grammar check altogether in the Word options menu, but do so at your own risk.